Chapter 4 — Raspberry Pi Pico W: MicroPython, MQTT, and Your First Sensor Loop
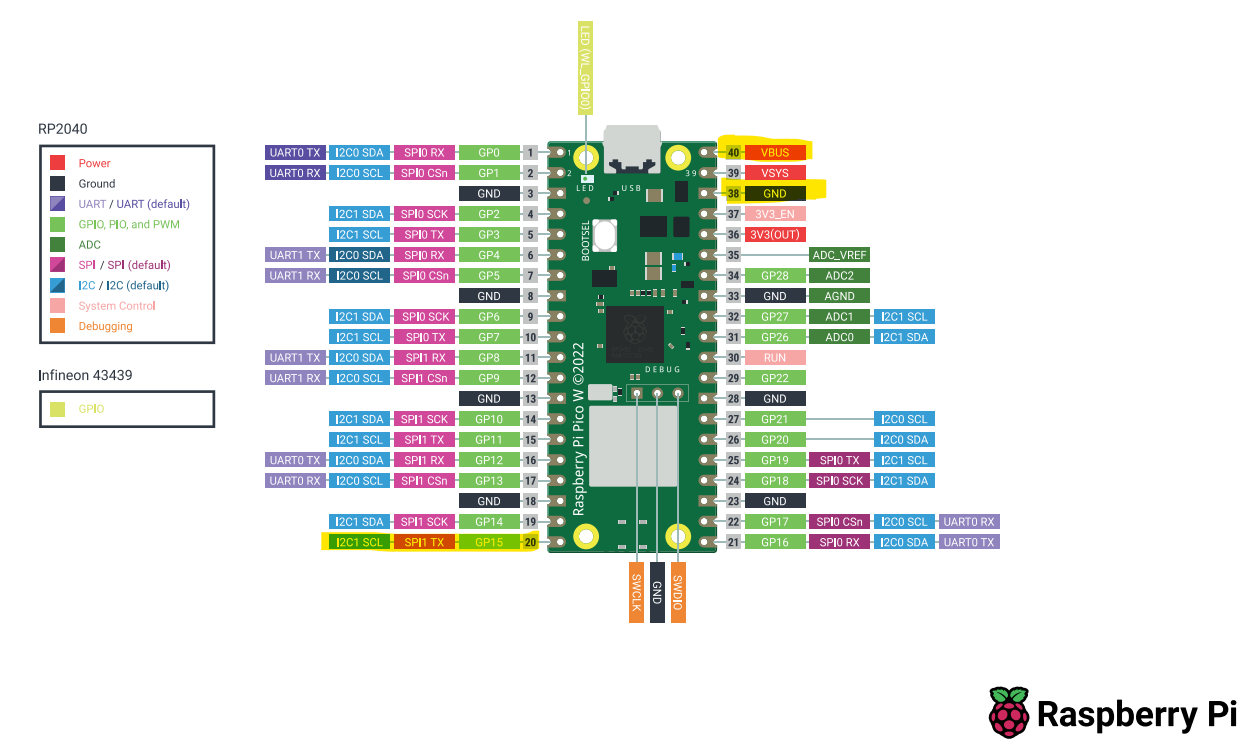
The Raspberry Pi Pico W costs around €6. It has WiFi, 264KB RAM, 2MB flash, 26 GPIO pins, and runs MicroPython. It consumes about 40mA at full operation — roughly 1/100th of a Raspberry Pi 4.
For sensor nodes that read data periodically and publish it to a broker, the Pico W is the right tool.
MicroPython: Python on a Microcontroller
MicroPython is a lean Python 3 implementation designed for microcontrollers. It runs in an interactive REPL (read-evaluate-print loop) over USB, which means you can test code one line at a time before deploying it.
The workflow:
- Connect the Pico W to your computer over USB
- Use Thonny IDE (beginner-friendly) or
mpremote(scriptable) to interact with it - Write your sensor reading code in Python
- Save it as
main.pyon the Pico W — it runs automatically on boot
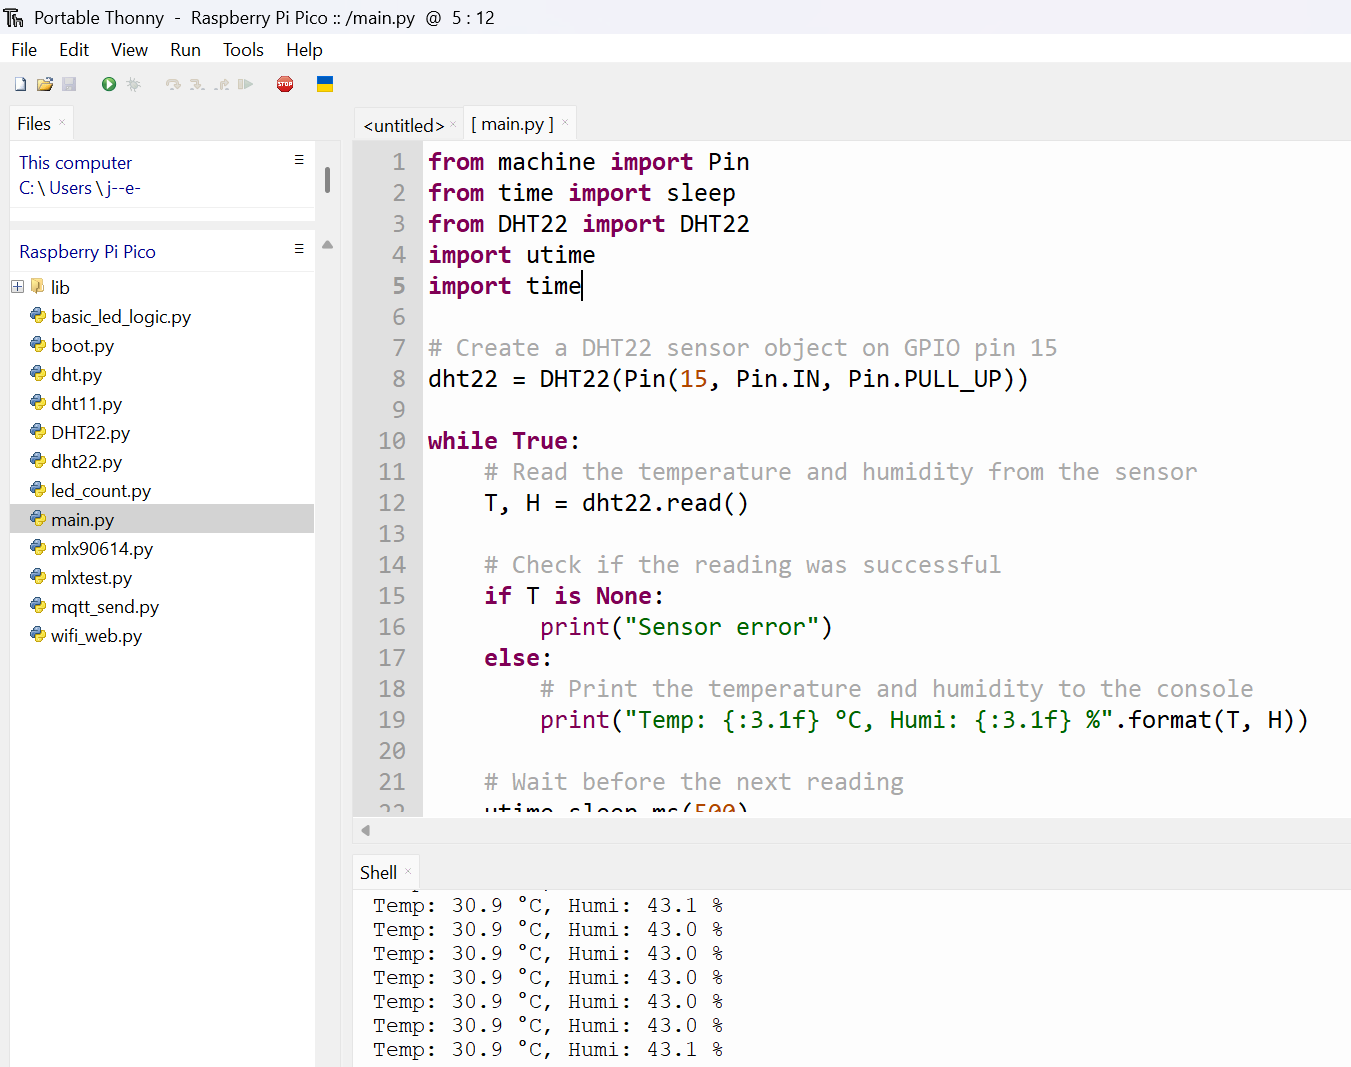
A basic sensor loop for a DHT22 temperature/humidity sensor:
import dht
import machine
import time

sensor = dht.DHT22(machine.Pin(15))

while True:
    sensor.measure()
    temp = sensor.temperature()
    humidity = sensor.humidity()
    print(f"Temp: {temp}°C  Humidity: {humidity}%")
    time.sleep(30)
Thirty lines of Python. One sensor. One wire. Readings every 30 seconds.
Connecting to MQTT
The next step is getting that data off the device and into a system where it can be stored, visualized, and acted upon. MQTT is the right protocol for this (covered in depth in Chapter 8).
The MicroPython MQTT client (umqtt.simple) handles the connection:
from umqtt.simple import MQTTClient
import network

# Connect to WiFi
wlan = network.WLAN(network.STA_IF)
wlan.active(True)
wlan.connect("your_ssid", "your_password")
while not wlan.isconnected():
    time.sleep(0.5)

# Connect to MQTT broker
client = MQTTClient("pico_w", "192.168.1.100")
client.connect()

# Publish sensor reading
client.publish("home/sensors/temperature", str(temp))
The broker address (192.168.1.100) is your local BunkerM or Mosquitto MQTT broker running in Docker on your Raspberry Pi or home server.
Home Assistant Integration via MQTT
Once data is flowing to the MQTT broker, Home Assistant can consume it through its MQTT integration. Configure a sensor entity that listens to the topic home/sensors/temperature and HA automatically tracks the value, timestamps it, and makes it available for automations and dashboards.
The full pipeline: DHT22 → Pico W (MicroPython) → MQTT broker → Home Assistant. Four components. Each is replaceable independently.
graph LR
    DHT22[🌡️ DHT22\nSensor] -->|1-wire GPIO| PicoW[Pico W\nMicroPython]
    PicoW -->|WiFi\nMQTT publish| Broker[MQTT Broker\nBunkerM / Mosquitto]
    Broker -->|MQTT subscribe| HA[Home Assistant]
    HA --> Dashboard[📊 Dashboard]
    HA --> Auto[⚡ Automations]

    style DHT22 fill:#e8f5e9,stroke:#388e3c
    style PicoW fill:#e3f2fd,stroke:#1565c0
    style Broker fill:#fff3e0,stroke:#e65100
    style HA fill:#f3e5f5,stroke:#6a1b9a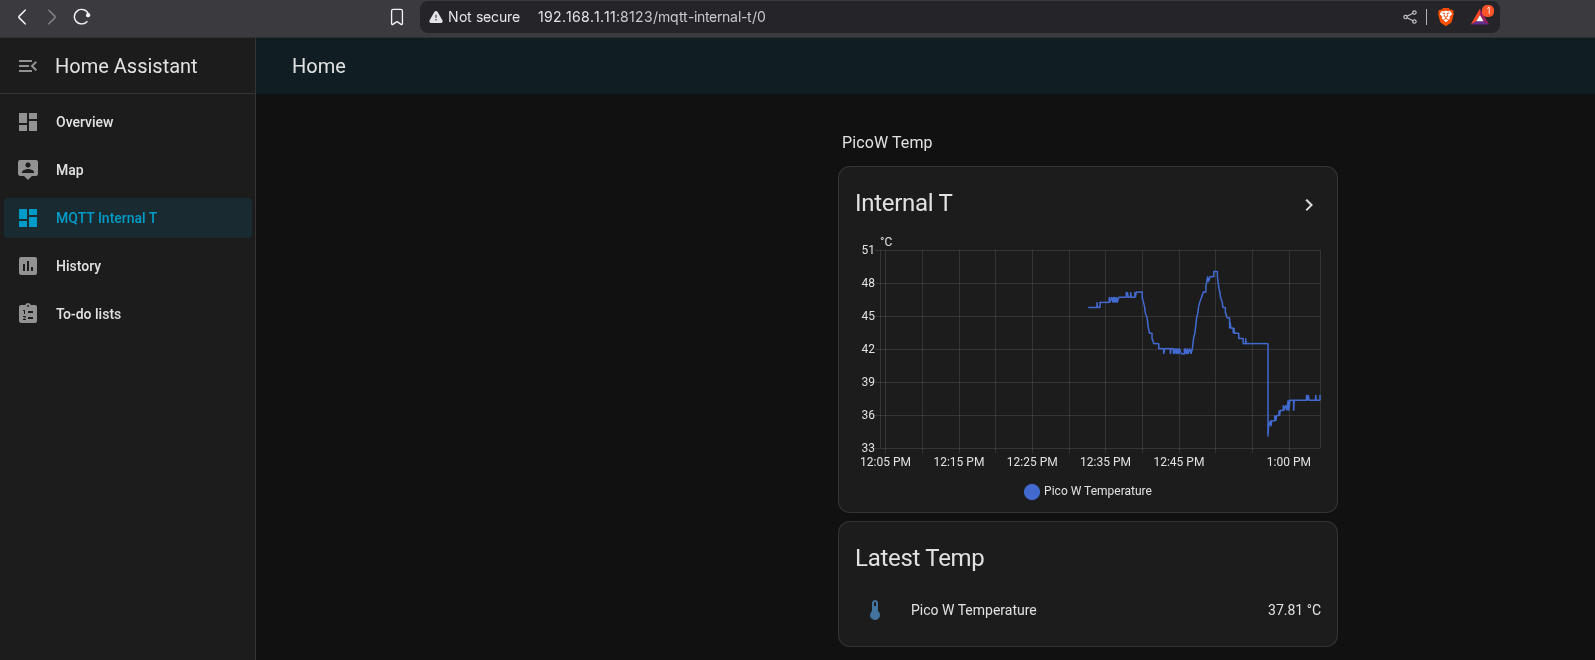
Takeaway: Pico W + MicroPython + MQTT is the lowest-friction sensor node stack. Learn it once, deploy it anywhere.